

How to Wrap a Badminton Grip in 6 Steps (Gradient Overgrip Edition)
How to Wrap a Badminton Grip in 6 Steps
Wrapping a grip is a five-minute job that most players do badly. The usual result is a handle that feels lumpy at the top, slides under tension, or comes loose at the finishing tape after two sessions.
Here is the method we recommend, in six steps. It works for any PU overgrip; the gradient-specific notes are marked separately, because a gradient grip gives you a choice that a solid-colour grip does not.
Before you start
You need: the racket, one overgrip, and a pair of scissors. That is all. The grip should ship with its own finishing tape — if it does not, you need tape as well.
Two preparation points:
- Do not remove the original grip unless you are deliberately changing the handle size. An overgrip is designed to be wrapped over the factory grip. Removing it changes the circumference and makes the handle feel smaller than you expect.
- Work with dry hands. Moisture on your palms transfers to the adhesive side of the tape and weakens the bond before you have even finished.
Step 1 — Have the racket and the grip ready
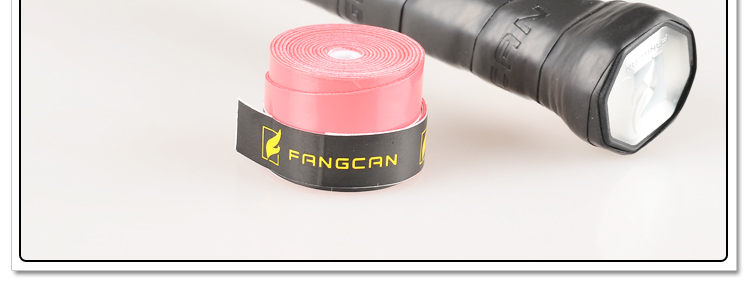
Lay the racket on a flat surface with the handle pointing towards you and the head away. Unroll the grip fully so it relaxes — a grip that has been coiled in a box for months holds a curve, and that curve becomes a wrinkle on the handle.
Check which end has the adhesive backing. One end has double-sided tape; the other does not. This matters in the next step.
Step 2 — Peel back the protective film
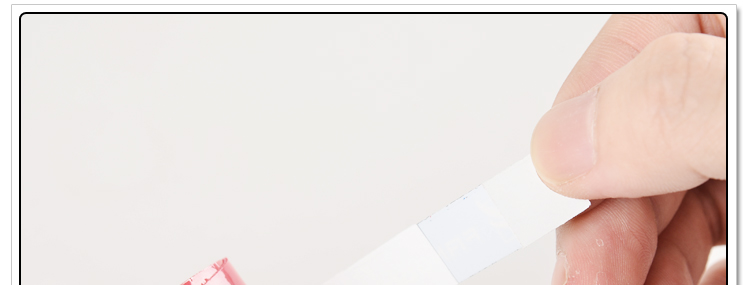
Peel the protective film off the adhesive side, starting from the end without the double-sided tape. Do not strip the whole film at once — peel it back a few centimetres at a time as you wrap. Film left hanging gathers dust and picks up lint from the floor.
Step 3 — Start at the base, edge flush with the butt cap
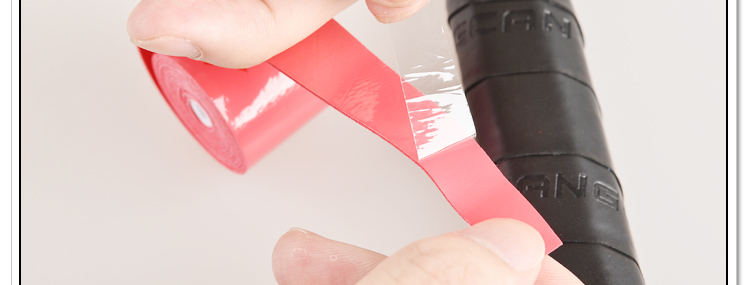
Start from the end without the double-sided tape, at the bottom of the handle. Keep the edge of the grip flush with the bottom of the handle — level with the butt cap, not above it and not wrapped over it.
This first turn sets the angle for everything that follows. If the starting edge is crooked, the entire wrap will run crooked, and the ridges will be visible from across the court.
Wrap the first turn flat, with no overlap, and press it down firmly.
Step 4 — Pull tight, tilt, and overlap by half
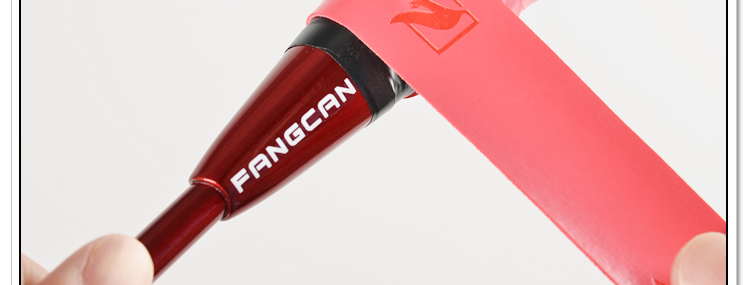
From the second turn onwards: pull the tape taut, tilt it, and cover roughly half of the previous turn.
Three things are happening at once here:
- Tension keeps the grip from sliding. Pull enough that the tape stretches slightly — around 5–10% — but not so much that the foam compresses and loses its cushioning. If your fingers ache after one handle, you are pulling too hard.
- The tilt creates the spiral. A consistent tilt angle gives you even, parallel ridges; a tilt that drifts gives you a handle that looks hand-made in the bad way.
- Half overlap is the standard. Less overlap and you get gaps that expose the grip underneath; more overlap and the handle grows thicker and the wrap runs out of length before you reach the top.
Keep the spacing even all the way to the top of the handle, stopping at the shaft cone.
Gradient note: this is where a gradient grip differs. The colour transition is fixed on the tape, so where you start determines where the fade sits. Start at the darker end and the dark portion lands low on the handle; start at the lighter end and the dark portion ends up near the cone, right where your hand sits for a smash. Decide before step 3, not after — unwrapping to fix it costs you the adhesive.
Step 5 — Secure the end with the finishing tape
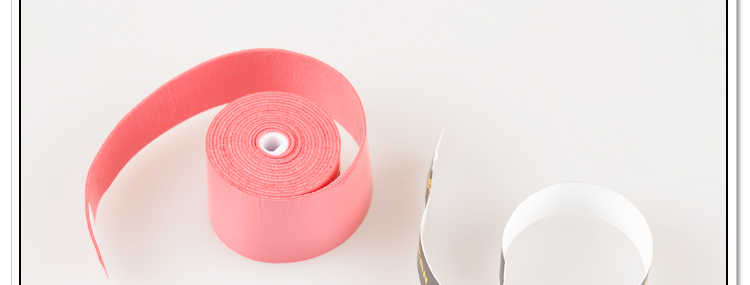
Trim the tape at the top of the handle, cutting at the same angle as the wrap so the end sits flush rather than showing a stub.
Then apply the finishing tape: wrap it over the cut end, pulling it slightly to tension it, and press down along its full length. Overlap the finishing tape onto itself by a centimetre or so — that overlap is what stops it lifting.
Do not skip the tension on the finishing tape. Most grips that come loose at the top were not wrapped badly; the finishing tape was applied flat, with no stretch, and it simply unpeeled itself over a few sessions.
Step 6 — Test the feel
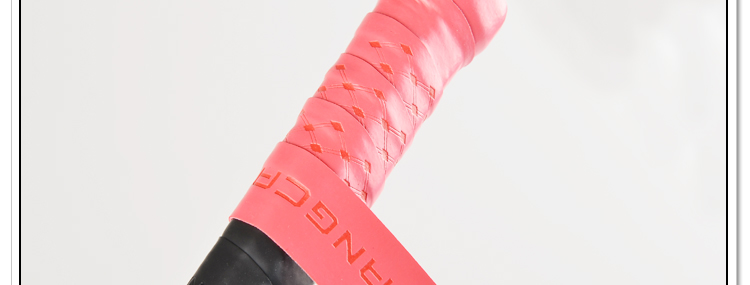
Grip the handle as you would in play — forehand, backhand, and at the top of the handle where you hold for a smash. Check three things:
- No ridges you can feel through your palm. You should feel a smooth spiral, not a staircase.
- No movement when you twist the handle against your grip. If it rotates, the tension in step 4 was too low.
- The end does not lift when you run your thumb along the top edge.
If all three pass, you are done. Cut the excess finishing tape, and the racket is ready.
Common mistakes
Wrapping from the wrong end. Starting from the double-sided tape end means the adhesive is at the bottom, where it is least needed, and the loose end is at the top, where it will lift. The adhesive belongs at the finish, not the start.
Pulling too hard. A grip stretched to its limit is thinner than its stated thickness, which defeats the point of a 0.65 mm cushioning layer. Firm, not brutal.
Overlapping too much. Beyond half-overlap the handle gets noticeably thicker and the tape runs short. If you run out of grip before the cone, this is almost always the cause.
Cutting straight across. A square cut leaves a visible stub at the top of the handle. Cut at the wrap angle.
Wrapping over the butt cap. Tucking the grip over the bottom edge makes the handle sit oddly in the hand and wears through at the corner. Keep it flush, not folded over.
FAQ
Can I reuse an overgrip?
In practice, no. The adhesive loses its bite when it is peeled off, and the surface has already taken your sweat and compression. A reused grip will slide. If you are practising a wrap technique, use an old grip on a spare racket rather than on the one you play with.
Should I remove the factory grip first?
Only if you want a smaller handle. Overgrips are designed to go over the original grip. Removing it drops the circumference by roughly one grip thickness — noticeable, and not usually what people want.
Is one grip enough for one racket?
A 1100 mm overgrip is enough for a standard badminton handle with half-overlap throughout. If you use a very long handle, wrap with less overlap to gain length.
Does the wrap direction matter?
Wrap so the overlapping edge faces away from the direction your fingers curl around the handle. That way the edges are pressed down by your grip rather than lifted by it, and the wrap lasts longer.
How often should I re-wrap?
When the surface goes shiny where your palm sits, or when the handle starts feeling hard underneath. For most regular players that is every 10–20 hours of play — more often in hot, humid conditions.
FANGCAN FCOG-13 is a 0.65 mm PU gradient overgrip, 1100 × 25 mm, in seven colourways. See the full specification or ask about producing your own colour.